|
|
 |
learn how to make your own blinkys!
You will need:
A paint programme
Icons/small pics (optional)
Imagination
|
 |
- first of all you will need a template. Right click and save on the blank rectangle.

2. Open up the blank rectangle in a paint programme. I use 'Paint it!' but you can use which ever one you prefer.
3. Next choose a colour and using the line tool, draw a border around the edges of the rectangle. draw a simple dotted
pattern on the border like the one shown --->

4. Now add a pixel picture to your rectangle. (take a look at the pixel page for some icons you can save. If your'e on
paint, go to edit and then paste from and click on the icon you wish to have in your blinky. You can also add text by clicking
on the text tool and make sure you make the font fit onto the rectangle! Save this as 'image1'

5. Now you have finished the first part of your blinky!
Next you need to change the colour of what you want to blink. For example if i want the text 'RED CHERRY' to blink then
i will change the colour of the text by using the paint brush or fill bucket tools.
Save this as 'Image2' --->

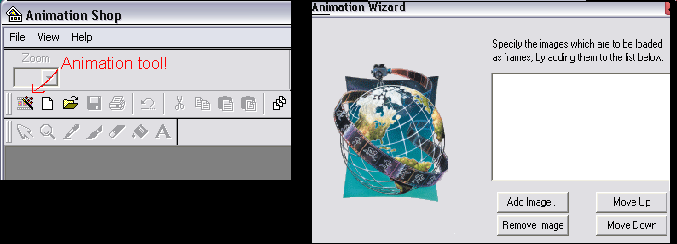
6. Now open up Animation Shop. Go to the animation wizard tool. Follow the steps through until you come to the step where
it tells you to ' Add Image, Remove Image'

7. Now open up the 2 images you saved, 'Image1' and 'Image2'
and press finish.
you blinky should show up! click onthe blinky and save as.
Congrats on making your first blinky! It should look a bit like this-->

|
 |
|
|
 |
|
|
 |
|
|
|
Tutorial by T-Graphix©, writting and example graphics made by Taiba Abbas
|
|
|
 |

